We recently finished a project we have been dreaming about since we moved into our house five years ago. The original counters were a dark, heavy granite and while beautiful and very high quality, they darkened the entire kitchen and primary bathroom, especially since we have black cabinets.
We had never replaced countertops before and had no idea what we were getting into. In fact, I just asked my husband what his top tips would be for replacing counters and his response was, “Don’t.” He’s joking (kind of), but the entire process has been a learning experience and, at times, a real nightmare, so I thought I would share what we’ve learned, as well as some before and afters of how it turned out.
Bottom line: is it worth it? 100%. We are so much happier with the look of the new counters, they are equally as durable, and have transformed the look of the kitchen and bathroom. But, there are things we wish we knew and could have prepared for, so now I’m sharing all of that with you!
1. Get Lots of Quotes:

Our old counters and backsplash
We couldn’t believe how different the quotes from various companies were, not just in price, but in what they offered. Here were some of the ways that the quotes differed:
- Price: Of course, everyone has their own price
- Original Counter Removal: Some companies would demo and remove the original counters and others wouldn’t. We had no idea some companies expected us to know how to remove the granite counters that we had and dispose of them. We did not pick one of these companies.
- Seams: This was the most important one to me. Every company had a different estimate for how many seams each counter would have and where to place them. I wanted as little to no seams as possible (obviously) and only one company said they could get this for us. We ended up going with this company and they got EVERY SINGLE ONE of our slabs the right sizes so we have NO SEAMS on all 5 counters we replaced. THRILLING. We also went with a quartz manufacturer that had a lot more options for slab sizes and we paid a premium for this (Cambria Quartz), so we knew that our goal of no seams was something that might be able to happen with the right company.
- Installation Timeline: Every company gave us a different timeline for completion. One company said one day and one said two weeks. It all depends on how many people they can bring in at a time. The company we went with showed up with an entire crew and they worked very quickly. So glad we didn’t pick a company that quoted us 3 days or 2 weeks of work.
- Starting Date: Every company has a different schedule. Some book out 6 months in advance, while others are not going to even show up and quote the job if they don’t have availability.
- Accessories: They all have a slightly different way of handling accessories, such as sinks, faucets, changes to the holes in the new counters vs. what you have, and make different recommendations. Some cut for sinks on your property, others want you to have your sink so they can pick it up and take it to their shop. Same with faucets and other cuts. This kind of thing doesn’t matter so much in the end, but it something to think about.
- Backsplash: Some companies said they could save our backsplash except for minor damage, while others said that they would damage enough where the replacement would look different from the original. Grout and tile age over time and a couple rows of brand new grout and tile would look different from 5-year-old grout and tile. One company would not repair the backsplash at all and another one wouldn’t take the job unless we agreed to demo the entire backsplash and redo it. More on this one later.
- Cleanup/Draping: We have learned this the hard way. Some companies don’t care about your home at all. They won’t cover floors, cover cabinets, do any kind of draping and won’t clean up after themselves at all. Others will do their best to protect the other surfaces from damage and will do light cleaning before they go. Ask them which one they are.
I had no idea now different the quotes would be and the more quotes we got, the more confusing it became – at first – until we landed on a company that seemed to offer the most of what we wanted: a large team that could do the project in one day, the ability to cut complete slabs with no seams, attention to detail, will demo and remove existing counters and more.
2. Plan For Demo Day:

The company we went with did recommend removing everything from the kitchen. Of course, I knew this mean the countertops and things in the first rows of drawers, but I had no idea he meant EVERYTHING. Once they were here, they got to work, and they assumed I had removed what I wanted to remove, so they just kept working.
I had no idea that the dust and dirt from counter and backsplash removal was going to go all the way down to the lowest draw and shelf in every cabinet – and even up into the top cabinets.
The time it took me to empty out each individual shelf and drawer, clean everything in it and wipe out construction dust and debris was way more than the time it would’ve taken me to empty it all out in the first place.
So, empty out absolutely everything in the entire area where you are having counters removed and installed.
Just pile it up completely out of the way of the construction are. Trust me, it’ll save you time in the end.
3. Do Backsplash, Too:

Remove everything you can and cover all surfaces
This is a personal choice, but if you are considering removing the backsplash down the line – do it at the same time as your counters. I’ve never seen tile removed, but I couldn’t believe what a mess it made and I definitely wouldn’t have wanted to do that on brand new counters I just installed.
So, do them at the same time if you can. You’ll be glad you did, especially as we move into the next items on this list. I don’t agree with the guys who said that repairing the backsplash wasn’t possible – I do think a good tile person could get it done and yes, it might be slightly off in color at first, but the time/cost of repairing is MUCH less than replacing entirely.
However, if you’d like a different backsplash, like we did, do it at the same time.
3. Cover Your Stuff:

Cover everything, clean out all the cabinets.
Don’t just clear out the stuff in your cabinets, but get tarps, old tablecloths, etc., and cover anything nearby. The dust and shards get all over the place. So, drape your nearby dining table (and push it out of the way if you can). Remove anything from the room and drape/tarpe nearby areas. If they’ll be walking in and out of an area with other furniture, move it out of the way so they don’t accidentally run into it or bump it with the countertop. I didn’t think through this enough and regretted it.
It would be wonderful if companies took the time to list for you all the things you should do to prep your home, or to do it for you, but the fact is, they are there to do a job and not tell you how to take care of your own home. They are going to just come in and do their job and assume you’ve taken the steps to protect your things the way that you want to. So, be more prepared than me and move and cover everything they’ll pass by or is near where the construction will happen.
4. Prepare To Clean:

Original bathroom counters and matching backsplash.
Perhaps this is another no brainer for others, but for me, it was a big surprise how much cleaning there was to do after. It’s going to be at least a good hour or more of cleaning, depending on the size of your space. Here are some things to have charged and ready to go after install:
- Vacuum: You’ll need a handheld vacuum with a lot of power to suck up all those chunks of counter, pieces of sheetrock and dust, especially if you’re removing the backsplash, too. You’ll need a full-size, powerful vacuum for the floors and surrounding areas, too. Debris will get all over the place, so just like when a glass shatters, you want to clean a wide area. If yours needs a good charging, empty it and charge it the night before so it doesn’t die on you halfway like mine did.
- Cabinet Cleaner: You’ll want to wipe down those cabinets from all the fingerprints, dust, etc.
- Cleaner: Wiping down the interiors of the cabinets and drawers won’t be enough to get all the fine dust. You’ll want a gentle, but powerful cleaner to get it all off.
- Gloves: There are sharp pieces of the broken counters and they will cut you if you’re not careful. Wear gloves, please. I cut myself several times before I found some. I should’ve been prepared.
- Mop: Just like the cabinets, the dust will get everywhere.
Be better than me, have all these things on-hand and ready to go before installation day and plan to do clean-up after.
5. Expect Repairs:

New bathroom counters and backsplash after 2 hours of scrubbing.

Does anything ever go as planned? Rarely. Prepare for the unexpected. That means, things are going to happen and they’ll need to be fixed.
In our case, the primary bathroom’s counter was installed with the WRONG SINKS. Not even kidding you. When they quoted us, they said we’d need to replace the sinks and we said, okay, just get the same ones. The e company ordered them, cut the counters in their shop, and installed it with the sinks in our bathroom before we saw it.
My jaw dropped when I went to look at it – the sinks were maybe half the size of the original ones and looked like tiny airplane bathroom sinks on a huge slab of quartz. It was almost comical how small they were.
Luckily, the company was willing to fix it and recut the slab, but asked us to order the sinks we wanted and they would reimburse us. We ordered the two sinks and they arrived…broken. We ordered more sinks: broken again. This happened FOUR MORE TIMES until we got 2 sinks that arrived in one piece.
Then, the company brought a new slab and cut for the sinks in our driveway so we knew it was right. I wasn’t happy about having to rip out brand new quartz and install it again. I was very worried it would damage my cabinets to keep doing this, but there was no damage from it and the end result was what we had imagined.
So, honestly, just expect these things to happen – even with a reputable company – and then if nothing goes wrong, you’ll be pleasantly surprised.

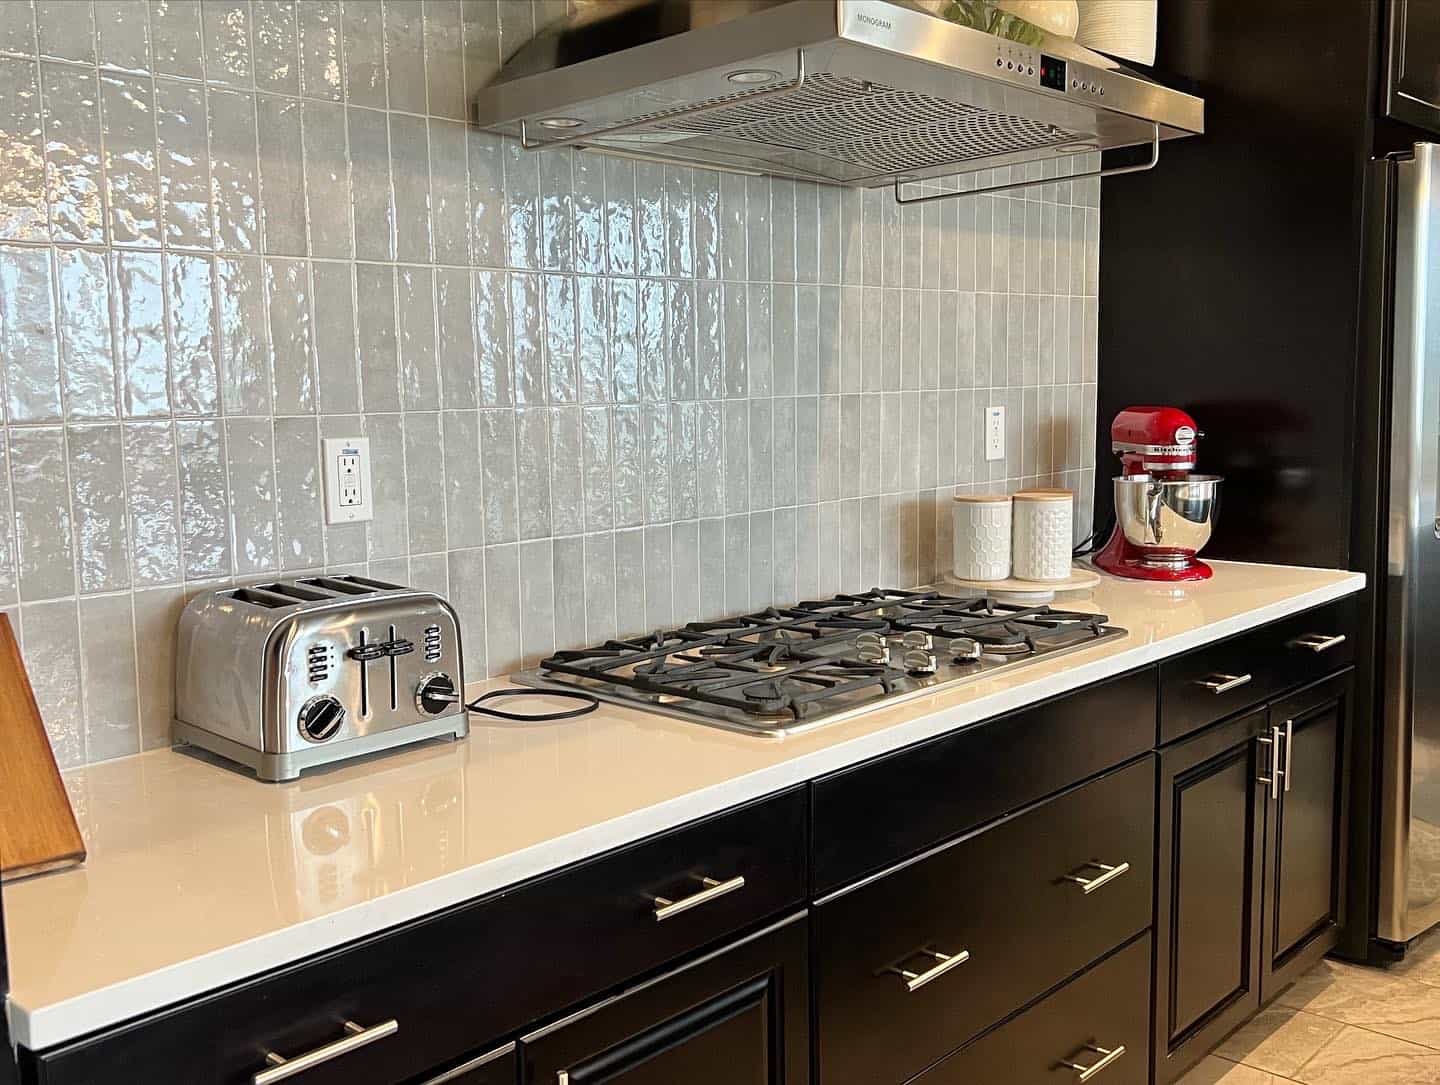
New kitchen counters and backsplash
Final Thoughts:
At the end of the day, you’re going through this counter installation and making this huge investment in your home because it will improve your quality of life and the aesthetic of your home.
Remember that the path will likely be bumpy, stressful and expensive, but in the end, will hopefully be worth it.

Finished kitchen counters, backsplash and island tile
I hope these tips help you prepare much better than I did. Luckily, we love our new counters and I’ll share more about what we chose in future posts!
Have a fabulous day,
E
