Our staircase landing has been a problem zone since we moved in. At first, the super tall ceiling with two giant windows seemed like a plus. It brought in a lot of light, and we had a cool view out of the top window when we were upstairs. All was well.
Until we realized that at certain times of the day – usually the exact times that we were trying to relax in the living room downstairs to watch TV – was when the sun would shine fiercely through those windows and straight into our eyeballs, making it impossible to watch anything.
We knew we had to fix it, but it took us awhile to figure it out.
The Story of the Staircase Landing:
Doesn’t this sound like the title of a Nancy Drew book? I loved those as a kid. Anyway, at first, we thought adding some roman shades to the windows would solve the problem. I measured and decided on some navy blue, blackout roman shades that I thought (key word here) were going to be cordless.
Said roman shades arrived and immediately there were two problems:
- They were not cordless
- They were not the right size
Except, we noticed this only after we had installed the one on the lower window. So, if you’re keeping track, now our staircase landing wall was looking like this:

Not great. I agree. However, we were tired parents with young kids and dogs and jobs and everything else, so guess what? We couldn’t return that roman shade, so we just…left if there? I know. But, it did block out the worst of the light and I taped up the cord so the kids couldn’t reach it. Also, the window was high enough that they couldn’t anyway.
Sometimes in life…you just leave it, because your energy is going places. But, I hated it, every time I looked at it. And, we never installed the upper window shade, because we didn’t want to rent a super tall ladder and get up there only to install a shade that we didn’t like, knew wouldn’t fit, and had an ugly cord.
And that’s how the wall looked for an embarrassingly long time.
The Staircase Landing Evolution:
Finally, I knew I had to fix it. And, when we decided on installing shutters in the whole house, our Sunburst Shutters rep sold us on how nice the shutters would look on the stairwell wall as well. I’d never thought about this, but he explained how it would not only block out the light, but we could still leave some of them open for light, too. So, we could tilt the upper window ones upward a little to block the worst of it, but the bottom one could stay open to let in natural light.
I went to Pinterest to find examples of stairwell landings that I liked and saw a pattern in the ones I was saving: painted wall, bright windows, and some kind of feature, either wood trim detailing on the walls or cool roman shades, etc. I ended up sharing this design board in a previous post on our plans for the wall:

Before we had the shutters installed, we decided to paint the wall the color we had chosen. Seemed smarter than trying to paint around it and potentially getting paint on the new shutters. So, this is what it looked like once we had it painted (unfortunately, the painters did a mess job, especially around the windows. Very frustrating).
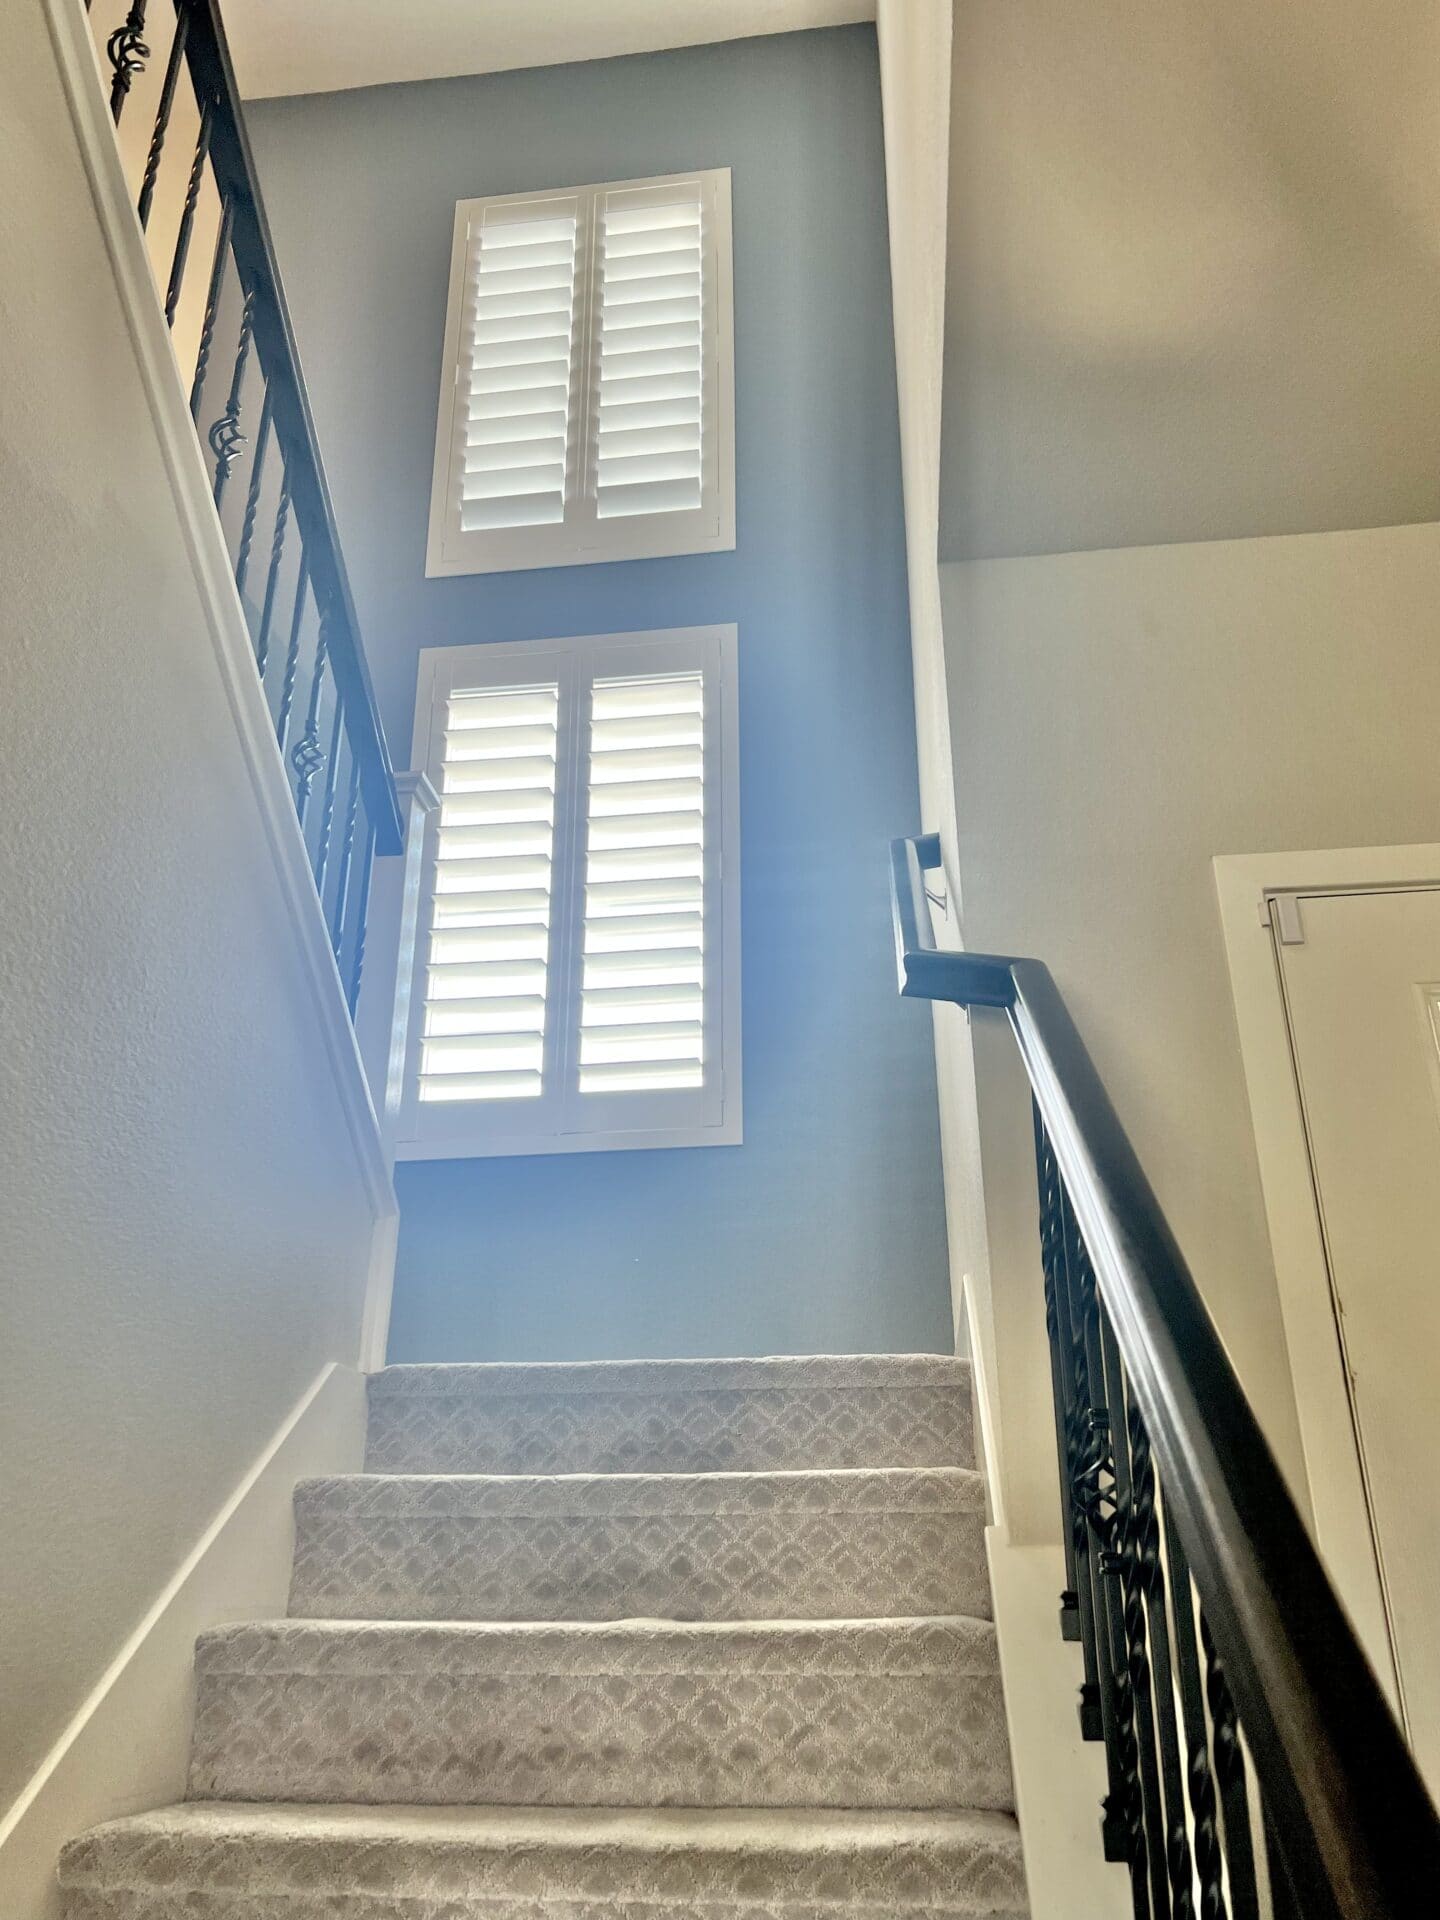
And then, the shutters arrived!
Shutters on Stairwell Windows:

It’s been really fun to see the difference that shutters make on our windows. They add that charm and warmth to a space. It gives Nancy Meyers vibes, which I love. They have been a great addition to the stairwell, as we no longer have the sun blaring in our eyes twice a day, and they also look nice. Win win.
In fact, after looking at them for awhile, we have cooled off on the idea of adding the roman shades. We still might, but again, that requires a very tall ladder and someone willing to climb all the way up it to install the top shade and, well, we just haven’t done it. We also talked to an electrician about adding a light in the stairwell, and due to the location, it would require bringing in scaffolding and other things, so the cost was prohibitive for us at this time. Maybe someday.
But for now, we’re very happy with the progress this space has made.
It’s come along way. Just look at the before and after:

Wowza. Big improvement!
Our Sunburst Shutters:
There’s a lot of options out there for shutters. For us, the deciding factor was the quality of the Sunburst Shutters product, the lifetime warranty, and the design options. It can feel overwhelming when talking to lots of companies, like we did, but once we compared all of them, Sunburst became the clear winner for us. To see how the shutters look in the kitchen/dining room, head to this post.
Here are the selections that we made for our shutters:
- Durable Polywood Shutters – The Polywood Shutters are made from recyclable wood substitute and painted with non-toxic paint finishes that are environmentally safe and below acceptable VOC emission levels. Because of the extreme heat that we see in this area, we didn’t want to risk wood warping, so we went with the much more resilient polywood shutter. These are 100% made in the US, have a lifetime warranty, and are moisture, temperature, and fire resistant, which we very much need. In fact, they are able to withstand extreme temperatures – even more so than our very hot summers. It’s a relief to know that if anything happens to them over time, they will be replaced.
- 4.5 inch Louver Size – The average is 3, but our windows are very wide and tall. I wanted to maximize the light and so that led to the 4.5-inch louvers for our house.
- Hidden Tilt – We went with a hidden tilt mechanism, which means you don’t see the bar down the middle in the front. You can see the mechanism from the side if you’re looking for it, but otherwise, it’s nice to have less obstruction to the view.
- Split Tilt – Also, I went with a split tilt, which I think is the coolest part of it. You can close the bottom or top, for privacy or to keep the light out of your eyes, but leave the rest of it open, for more natural light or to be able to see out. I love this feature a lot more than I thought I would. This wasn’t an added cost, either, it was included.
- Mini Craftsman Trim – It was important to me to have a trim option that matched the baseboards and other styles in our home. The mini craftsman trim was the perfect trim for us, but they had quite a few options, more than other people we talked to.
- Tax Credit – Sunburst Polywood shutters have an exclusive, patented weather stripping, which adds additional window insulation. This helps the shutters last longer than traditional wood shutters, and insulate up to 70% more efficiently. The result is lower heating and cooling costs by blocking up to 30 degrees of airflow and an additional tax credit up to $1200.
- Easy To Clean – A damp cloth is all it takes to clean these quickly and easily. So much faster than dealing with all of those skinny little blinds.
Shutter Installation:

We all know what a challenge it can be to have people in your home. Our experiences over the years have run the gamut from total nightmare to amazing. I am very grateful that the Sunburst installers were fantastic. They set up all the windows in the spaces before beginning to install them and then they got to work. They were able to do the entire two-story house, and dozens of windows, some requiring very tall ladders, in about four hours. They covered covered their shoes, cleaned up after themselves, took the old blinds away, and were generally very respectful of our home. We know too well that this is not always the case when hiring companies, so I appreciate great installers when we have them.
Things To Think About:

Shutters are customized exactly to your window size and preferences, so you’ll want to go into your appointments with some idea of what you’re looking for.
Here are some things to consider: What is the weather like where you are? What style shutter do you like? What color do you want (some are only available in certain colors, while others can be painted any color)? What features are important to you (hidden tilt, split tilt, etc)? What kind of install time do you need? Sunburst wasn’t the fastest option, but it had everything we wanted, so we were willing to wait. If you’re looking to do something quickly, check with your local Sunburst franchise and let them know the time frame that you have and see if they can do it before signing a contract.
Also, see if you can look at the shutters you’re considering in a house near you. They’ll bring samples to your home, but it’s always different to see them fully installed. We were lucky in that our local Sunburst works with a builder that had model homes nearby, so we were able to go to the model homes and see the shutters installed. That really helped us make the decision, because we loved how the shutters looked in the model homes.
*****
Getting shutters is something we’ve been thinking about and saving up for for a long time. While it’s always nerve-wracking to make such an investment in our home, this has been one that we are very happy with. Now that we are moving quickly into what will be another hot summer, I am extra grateful to have that added layer of insulation to keep the cold air in and the hot air out.
I’ll be sharing more pics soon to show you the impact the shutters have made in the master bathroom, too. It looks so different!
Until then, feel free to go to Sunburst Shutters website and customize your own dream shutters.
Any questions? Leave them in the comments below!
Have a fabulous day,
E
