Want to channel your inner giraffe for Halloween or your next costume party? Who can blame you – the spots, long neck, and adorable hair are fun and flattering. But, what if you don’t want to rot your skin with gross costume makeup? You don’t have to!
Today, my friend Annie is here to share with you the 4th costume makeup tutorial in our series – on the giraffe! Something I love about all of Annie’s costume makeup tutorials (see the deer, mermaid, and skeleton, too) is that they use real makeup, not the cheap costume makeup that will mess up your skin and cost you a small fortune for one day of use.
Nope, you’ll be able to create this look using makeup that you can repurpose into every day use. Plus, having used this brand of makeup myself, I can attest to its incredible quality. The eyeshadows are highly pigmented and the foundation easily blends for a natural, but better, look. Or, recreate it using similar makeup you have at home.
What You Need for Giraffe Makeup:

I’ll sharing all of the sources for what Annie uses to create this look below. Annie is a rep for the makeup now, because she loves it so much, and she’s who I worked with when I bought it for myself. Totes recommend. So, if you wanted to chat with her about color matching for your skin, she can help you pick out the perfect colors, or you can just grab the exact colors she uses to create this awesome giraffe makeup look. Either way, check out her Instagram, where she shares tons of makeup hacks and tricks, and you can DM her there if you’d like help picking out the right colors for your skin.
Makeup Used for the Giraffe Look:

Face:
- All over foundation – Sunlit
- Contour – Indigo
- Bronzer – Bella
- Brown spots – Indigo
- Highlights on spots – Moonlit
- Brows – Trust
Shadows:
Brushes:
How To: Giraffe Makeup Tutorial
Step 1: Start With Eyes

Start with your eyeshadow, so that you don’t get the powder on your face after doing your foundation. Use Bubba first, all over the eyelid. Then, add a little brown shimmer with Bright Eyes in the same area, darken the crease with Trust, and highlight the brow bone with Sabrina.
Step 2: Prep The Face

Even out your skin tone with something like Sunlit foundation and using the IIID brush. Add contour with a dark and warm-toned contour like Indigo. Make sure the contour is noticeable on both cheeks and along the hairline.

Step 3: Fill The Brows

Use Trust and a line brush to fill the brows to create a really dark, solid, and sleek brow. Make them really defined.
Step 4: Time for Spots

Now, the fun begins! Use the small end of the Multitasker brush and Indigo contour to draw outlines of spots.Begin in the center of the forehead and move outward and down. This ensures you don’t have to cross over finished areas and risk smudging them.

Make the spots look like they could fit into each other like puzzle pieces, but do not repeat the same shape too often. No two giraffes are alike, so don’t feel like you need to copy my spots – make them your own!
As you go down your neck, expand to take up more of the area. This gives the illusion of a long, slim giraffe neck. Don’t be afraid to mess up! The beauty of the next step is we fill them in and correct them as needed. Cream is so forgiving!


Step 5: Shape The Nose

Buff some Bella bronzer on the nose, to give the signature look of a long nose like giraffes. Add the bronzer all over the tip of the nose, nostrils and up the ridge of the nose to lengthen.
Step 6: Do The Lips

Accentuate your lips by coloring around them with Indigo contour a well.
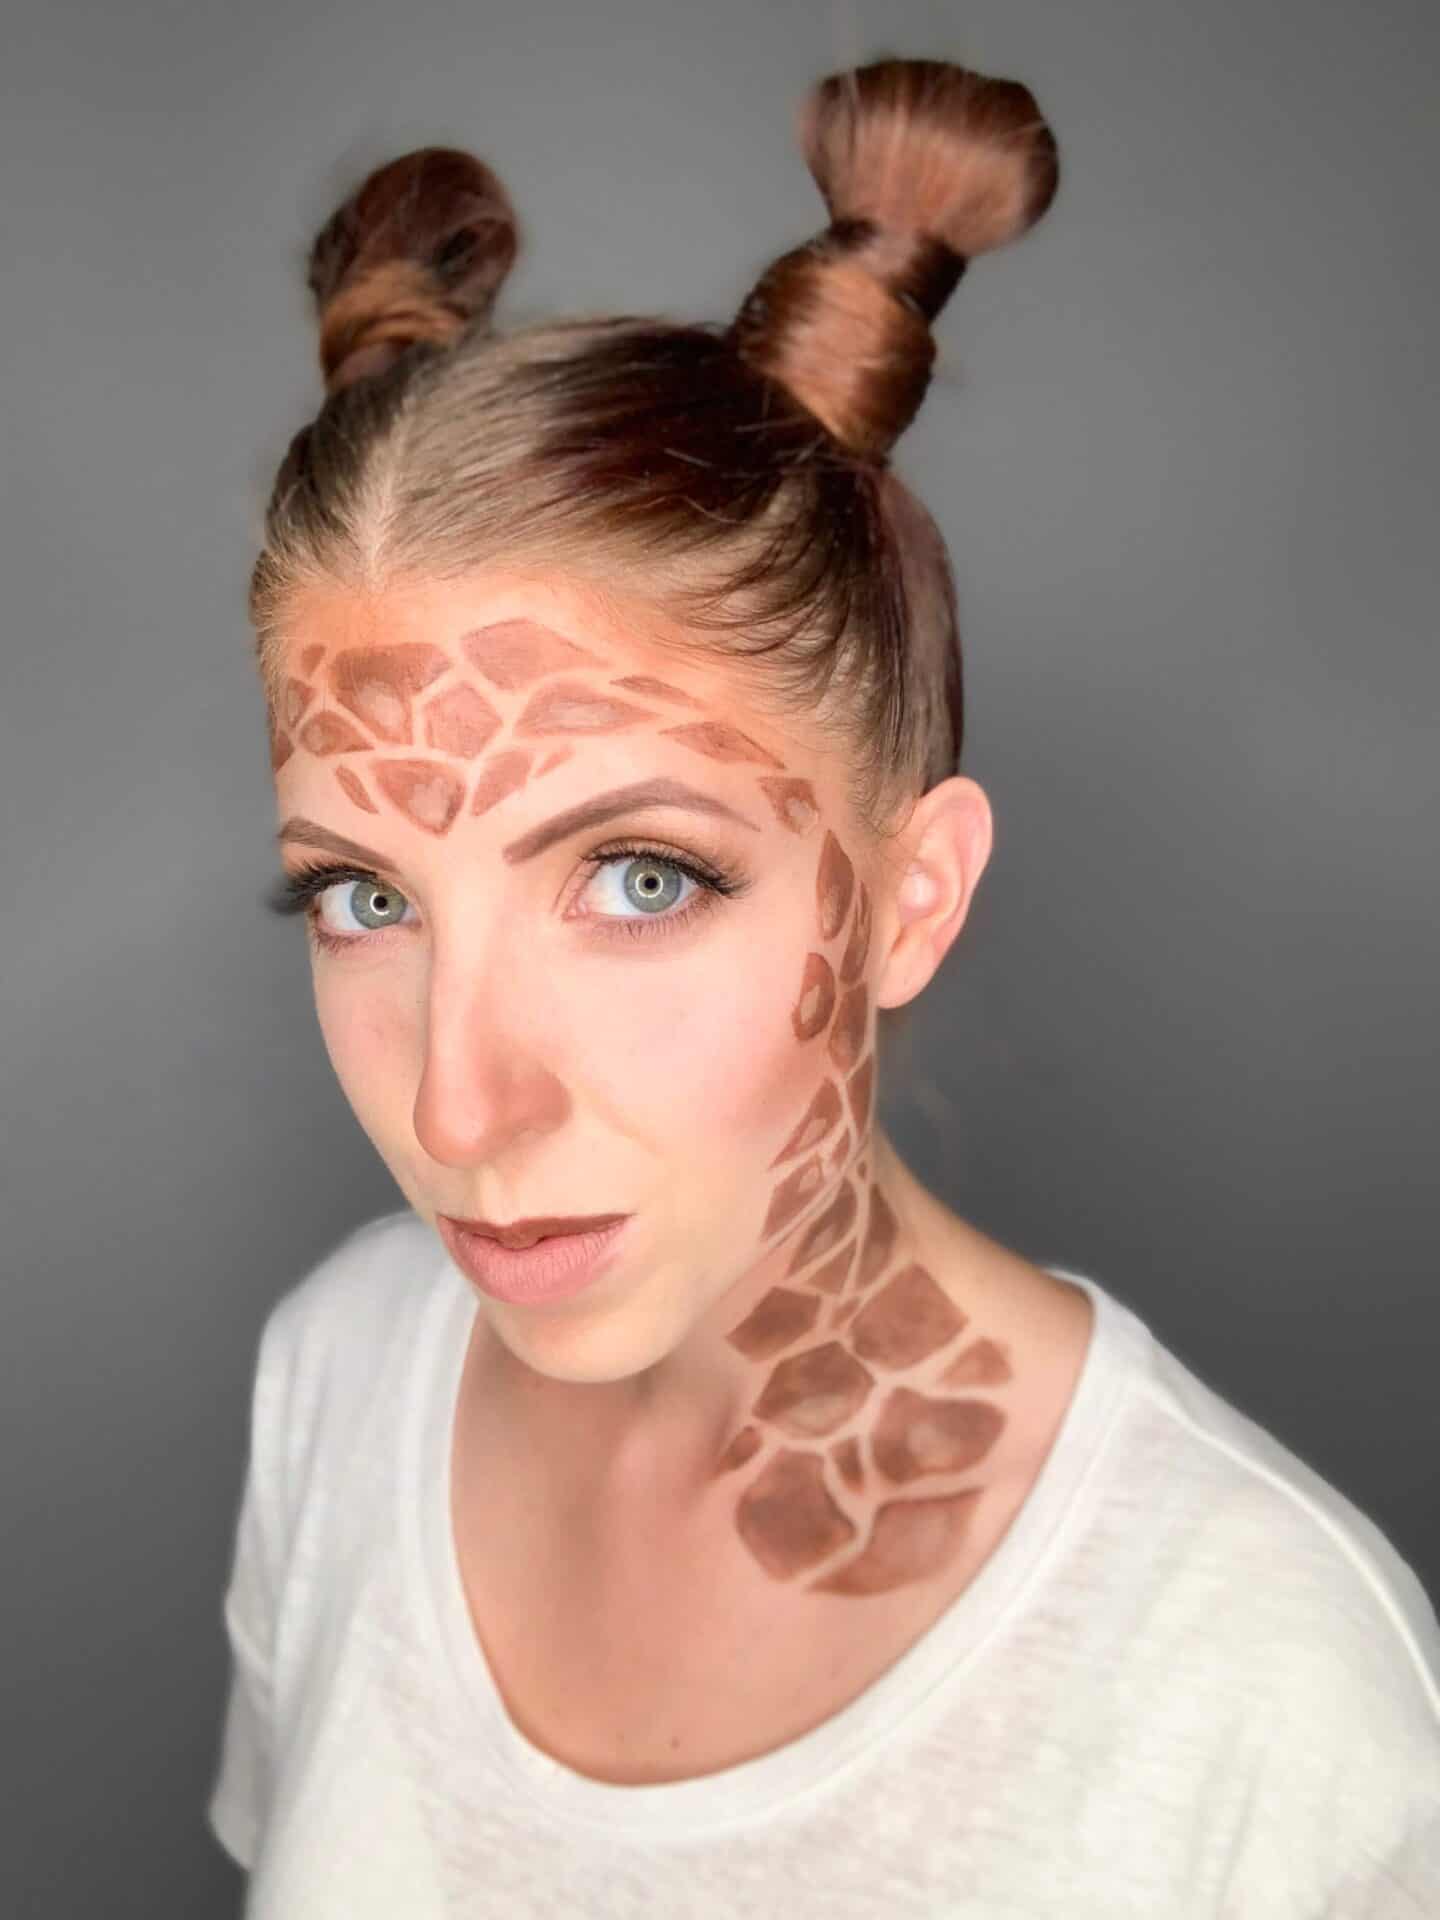
Step 7: Finishing Touches
Finish the look with long, fake lashes. Then, spilt your hair into two sections high up on either side. Shape them into buns and wrap the excess hair around the bun to thin it out and create a horn-like shape.
